Modifying General or Report Access for a Specific User
As noted above, the Administrator (ADM) user, or a user with administrator security access, will have the ability to select one of the following access types to the various folders/windows:
- Full Access: User can view, modify and edit the specified folder/window.
- Read Only Access: User cannot modify or edit, but can view the specified folder/window. In some instances, the user will be able to modify their own settings only (e.g. Password, Narcotic Code, etc.).
- No Access: User cannot view, modify or edit the specified folder/window.
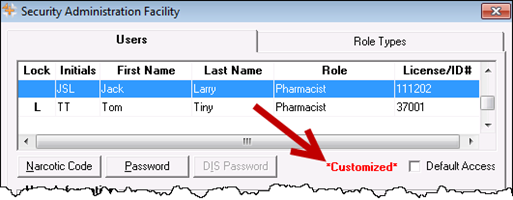
If at any point the permissions a specific user has differ from the permissions assigned to that Role Type (as indicated in the Role Types tab), an indicator will appear notifying you the user’s access is customized, as shown below:

Note: After the PharmaClik Rx 1.8 the upgrade, a number of your users will have *Customized* appear when the user is highlighted. This is because the permissions they had prior to PharmaClik Rx 1.8 will be retained and will likely differ from the default set in the Role Types tab. To have the user permissions for a specific user match the default for their role, select the Default Access checkbox. See Resetting Users to Default Access for more information.
To customize General or Report Access for a specific user, do the following:
- Select the More > Security. The ‘Security Login’ window appears.
- Enter the login credentials of the user who wishes to access the Security window. This user must be the Administrator (ADM) or have administrator security access.
- Select the OK button. The ‘Security Administration Facility’ window appears.
- Highlight the user you wish to modify access for.
- From the General Access tab, select the appropriate checkboxes for the folders/windows you wish to customize access for (e.g. Full Access, Read Only, No Access).

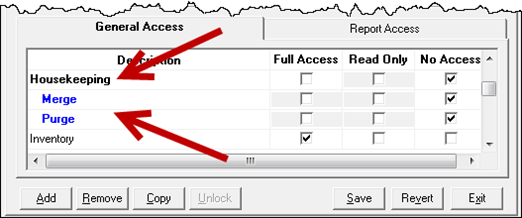
Note: You cannot assign a child row more access than the parent row. For example, a user cannot have No Access to Housekeeping (parent row), but Full Access to Merge and Purge (child rows). PharmaClik Rx will automatically update the parent row with the corresponding access and grey out the other access options.
- From the Reports Access tab, select the appropriate checkboxes for the reports you wish to provide the user access to (e.g. Full Access, or No Access).
- Select the Save button.